Welcome to Noorg
Let's discover Noorg in less than 5 minutes.

Getting Started
Caution: Noorg is currently in a pre-alpha stage. While it offers powerful features, it is still under active development and may not be stable. We strongly advise starting slowly and backing up your note directory regularly. Experiment with Noorg in a safe environment to discover its potential without risking your important data.
Get started by installing the prerequisites.
What you'll need
- Rust and Cargo
- Python 3.9+
- Lua 5.4
Installation
⚠️ Noorg is currently only supported on macOS and Linux.
macOS
- Install Rust and Cargo:
# macOS
curl --proto '=https' --tlsv1.2 -sSf https://sh.rustup.rs | sh
- Clone and install Noorg:
git clone https://github.com/realjockel/noorg.git
cd noorg
If you want the system tray and settings UI, you can use the full install script.
./install.sh
If you only want the CLI you can use
./install.sh cli-only
Uninstall with:
./install.sh uninstall
- Install Python dependencies:
brew install python@3.9

# Add to ~/.zshrc or ~/.bashrc
export PYTHON_CONFIGURE_OPTS="--enable-framework"
export PYO3_PYTHON="/opt/homebrew/opt/python@3.9/bin/python3.9"
- Install Lua
brew install lua # macOS
# find lua path
lua -e "print(package.path:match('([^;]+)/?.lua'))"
# macOS: Copy to Lua package path
sudo cp json.lua /opt/homebrew/share/lua/5.4/json.lua

# Verify installation
lua -e "require('json')"
Linux
- Install Rust and Cargo:
curl --proto '=https' --tlsv1.2 -sSf https://sh.rustup.rs | sh
- Install Python dependencies:
add-apt-repository ppa:deadsnakes/ppa
sudo apt-get install -y python3.9 python3.9-distutils python3.9-venv
sudo apt-get install -y python3.12-dev
- Install Lua dependencies:
sudo apt-get install -y lua5.4 liblua5.4-dev liblua5.1-0-dev
curl -O https://raw.githubusercontent.com/rxi/json.lua/master/json.lua
sudo mkdir /usr/local/share/lua/5.4/ -p
sudo cp json.lua /usr/local/share/lua/5.4/json.lua
- Install additional dependencies:
sudo apt-get install -y libxdo-dev libsqlite3-dev libssl-dev libglib2.0-dev libgirepository1.0-dev gcc g++ clang libgtk-3-dev
- Install noorg:
Currently Linux only supports the CLI version of Noorg.
./install.sh cli-only
Start Using Noorg
Run the system tray application:
noorg
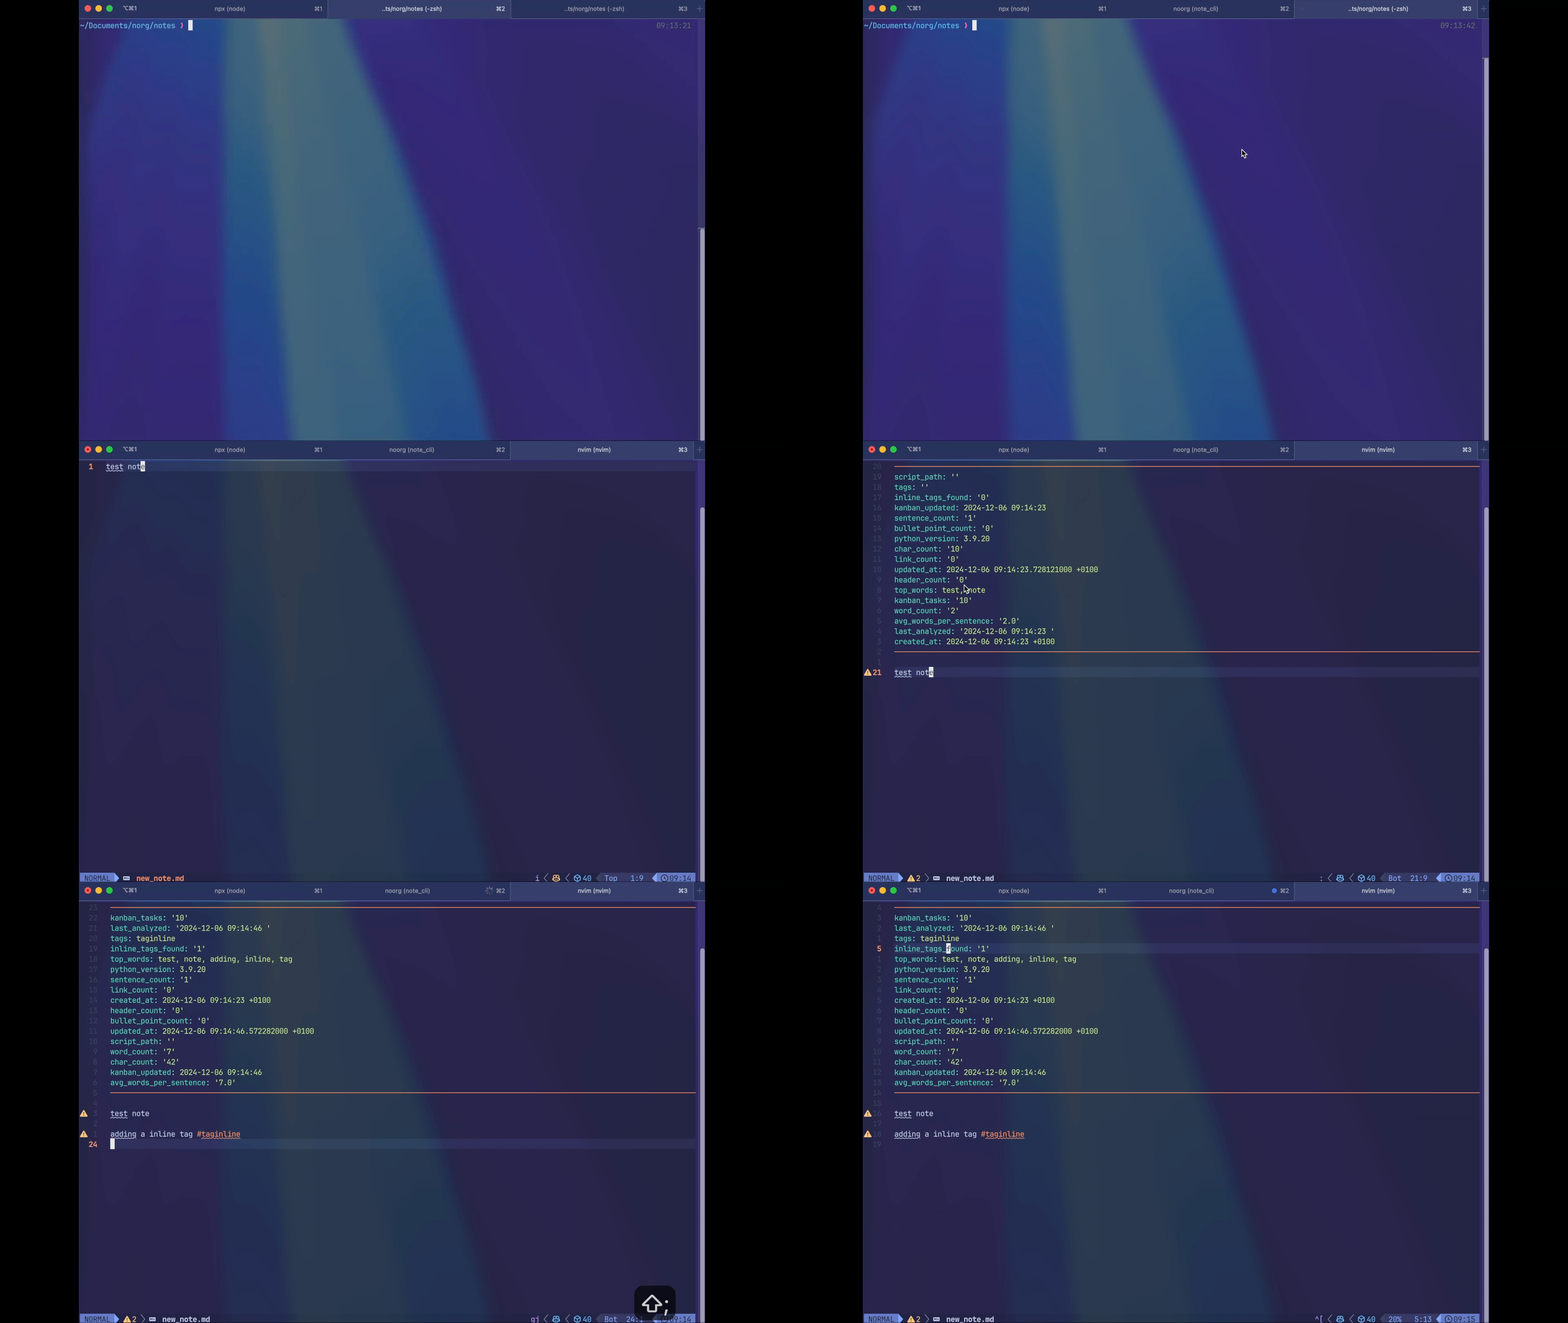
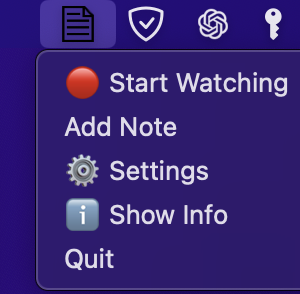
This opens the Noorg system tray application. You can now interact with Noorg using the system tray icon. In the system tray, you can create a note, start the watcher, and open the settings window to configure Noorg.

if you only installed the CLI version you can use the CLI to interact with Noorg.
noorg watch
Settings
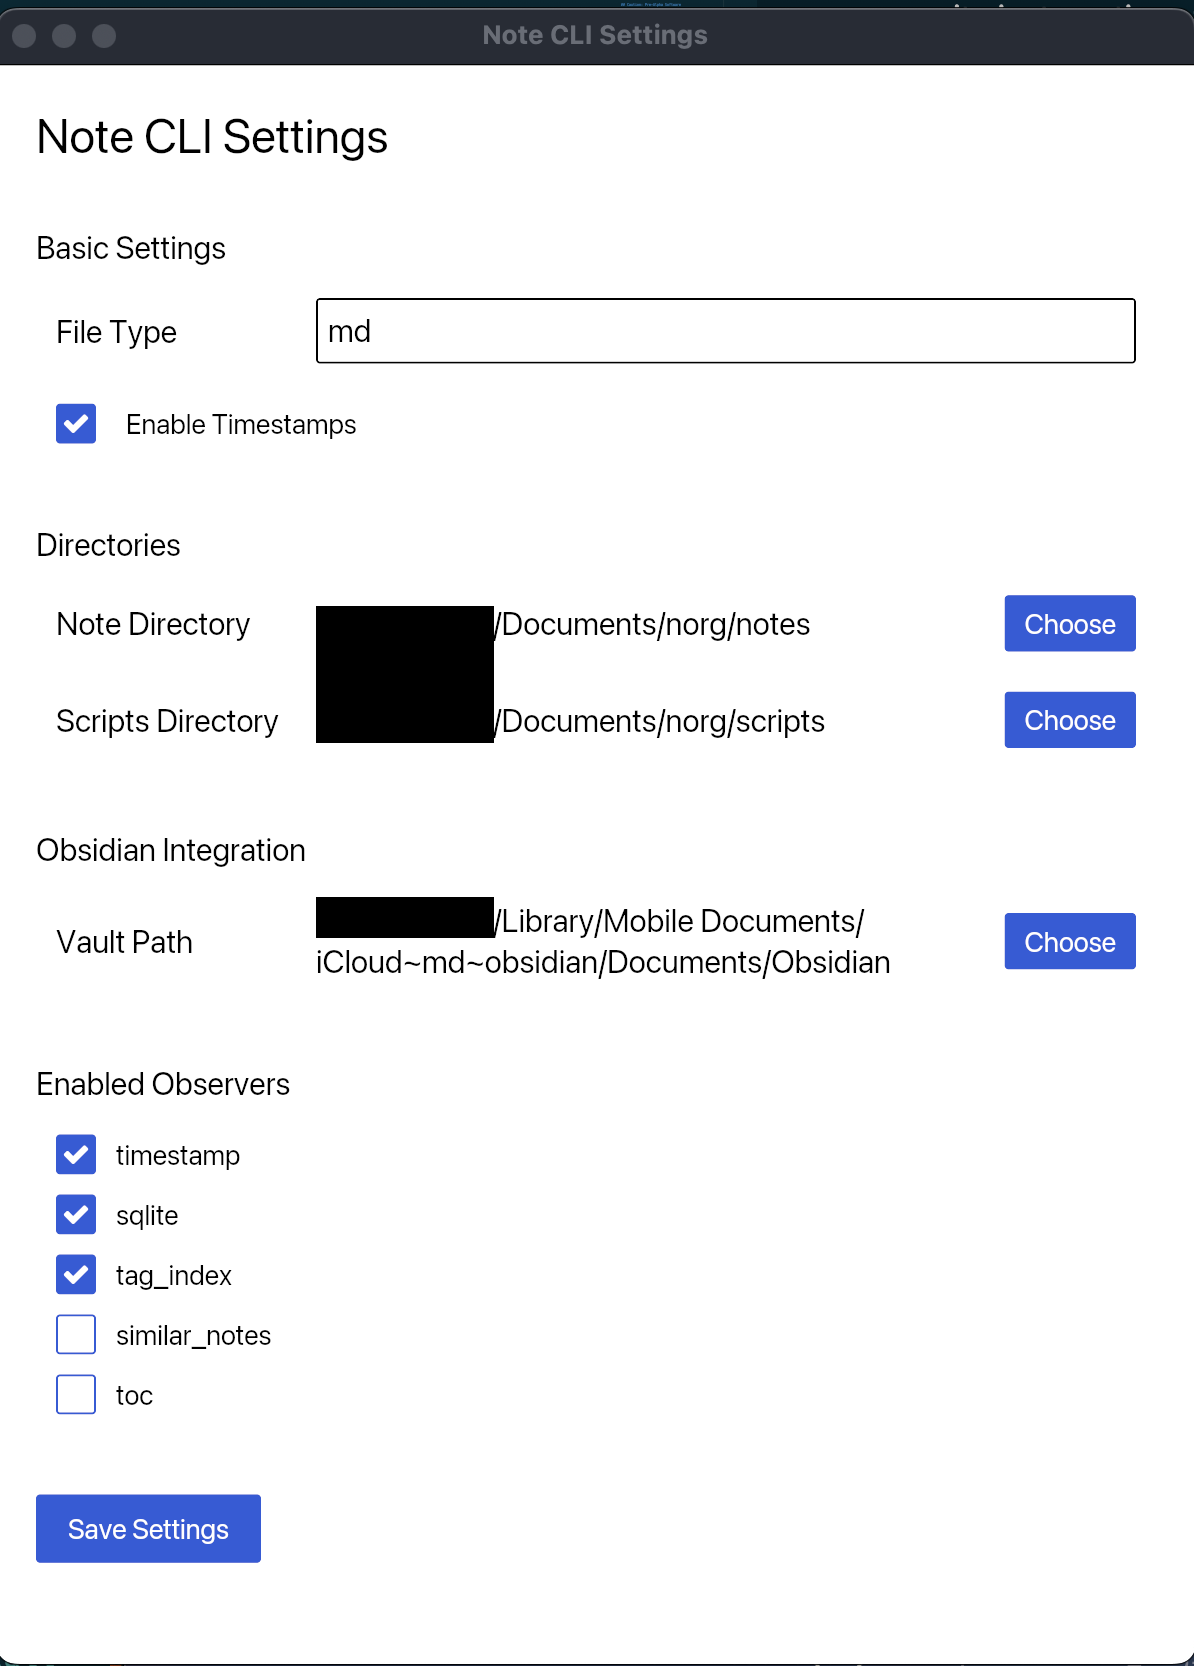
Open the settings window to configure Noorg.

- File Type: The file type for your notes (Markdown, Org, etc.).
- Notes Directory: The directory where your notes are stored.
- Script Directory: The directory where your scripts are stored. (Python and Lua)
- Obsidian Integration: If you want to create notes with the note_cli and open Obsidian, you have to set the vault_path and enable. You also have to enable
Allow URI callbacksin Obsidian settings.Settings -> Files and Links -> Allow URI callbacks. - Enabled Observers: Enable or disable default RUST based observers. (Python and Lua observers are not included in this list)
Create your first note:
There are multiple ways to create a note with Noorg. You can use the system tray application, the CLI, or your favorite text editor.
Create a note with the system tray application:
- Click on the system tray icon.
- Click on "Create Note".
- Enter the title of your note.
Create a note with the CLI:
title: The title of the note.body: The body of the note.fields: Additional fields for the note. Those are saved as front matter in the note file.
noorg note_cli add --title "My First Note" --body "Hello Noorg!" -f "priority:high" -f "project:X"
Create a note with your favorite text editor:
You can create a note with your favorite text editor and save it in your notes directory. Noorg will automatically process your note.
or you can use noorg note_cli add to create a note with your favorite text editor:
noorg note_cli add --title "My First Note" -f "priority:high" -f "project:X"
You simply have to remove the --body argument and Noorg will open your default text editor to write the body of the note.
Setting the Editor:
export EDITOR=nvim
Watch your notes directory
Watch your notes directory for changes with the CLI:
Start the watcher with:
- System Tray Application
- CLI
noorg note_cli watch
Open your favorite text editor and start writing in Markdown. Noorg will automatically process your notes as you write them.
Import notes and sync with Noorg
If you have already created notes, you can import them into your notes directory and sync them with Noorg to run all observers.
noorg note_cli sync
What's Next?
- Try out different observers and automation features
- Extend functionality with Python, Lua, or Rust